A great hem can change the entire look of an outfit. Knowing how to hem pants lets you fine-tune the length of trousers, jeans, and wide-leg styles so they skim your shoes neatly instead of pooling, dragging, or catching underfoot.
This pant hemming tutorial walks you through measuring, marking, cutting, pressing, and finishing a hem with a sewing machine, a hand needle, or no-sew hem tape. Work slowly on the first pair, and you will have a dependable alteration skill for the rest of your wardrobe.
How to Hem Pants: Choose the Right Length First
Before you decide how to hem pants, try them on with the shoes you expect to wear most often. Shoe height, sole thickness, and the width of the pant leg all affect where the hem should fall. A length that works with flat sneakers may be too short with a heeled boot, while a long, wide leg needs enough clearance to avoid brushing the ground.
Put on the pants inside out if possible, then stand naturally in front of a mirror. Ask someone to help pin the hem, or fold one leg up and use a mirror to compare both sides. For jeans and casual straight-leg pants, the hem usually sits at or just above the top of the shoe; for tailored trousers, aim for a small break at the front rather than a deep fold of fabric.
Check the garment’s original hem before changing it. Jeans often have a distinctive faded or thicker finished edge, while dress pants may have a blind hem or hem tape inside. If you are refreshing pieces from our pants and trousers collection, match the hem style to the fabric and silhouette for the most intentional result.
- Wear the shoes you will actually pair with the pants when you mark the length.
- Stand upright with your weight balanced on both feet, not leaning or bending one knee.
- For wide-leg or flared pants, leave enough length to cover part of the shoe without touching the floor.
- Mark both legs from the same reference point, such as the inseam or the original hem.
- Have someone check the back hem, since it is harder to judge accurately in a mirror.
Gather Tools and Prepare the Fabric
The best method for how to hem pants depends on the fabric, the amount of length you need to remove, and the finish you want. Lightweight trousers are easy to fold and stitch, while denim, linen, stretch knits, and slippery fabrics each benefit from a slightly different approach. Read the care label before applying heat, especially if your pants contain synthetics or delicate fibers.
Wash or dry-clean the pants according to their care instructions before hemming whenever possible. Natural fibers can shrink, and pressing a hem into unwashed fabric can leave you with a finished length that changes after the first cleaning. Iron the pants smooth so you can measure and mark a crisp, even line.
If you are learning on a casual piece, choose a fabric that is easy to control rather than starting with a treasured pair. Denim from our jeans and denim collection is durable, but its seams can be thick, so use a sturdy needle and take your time crossing the side seams.
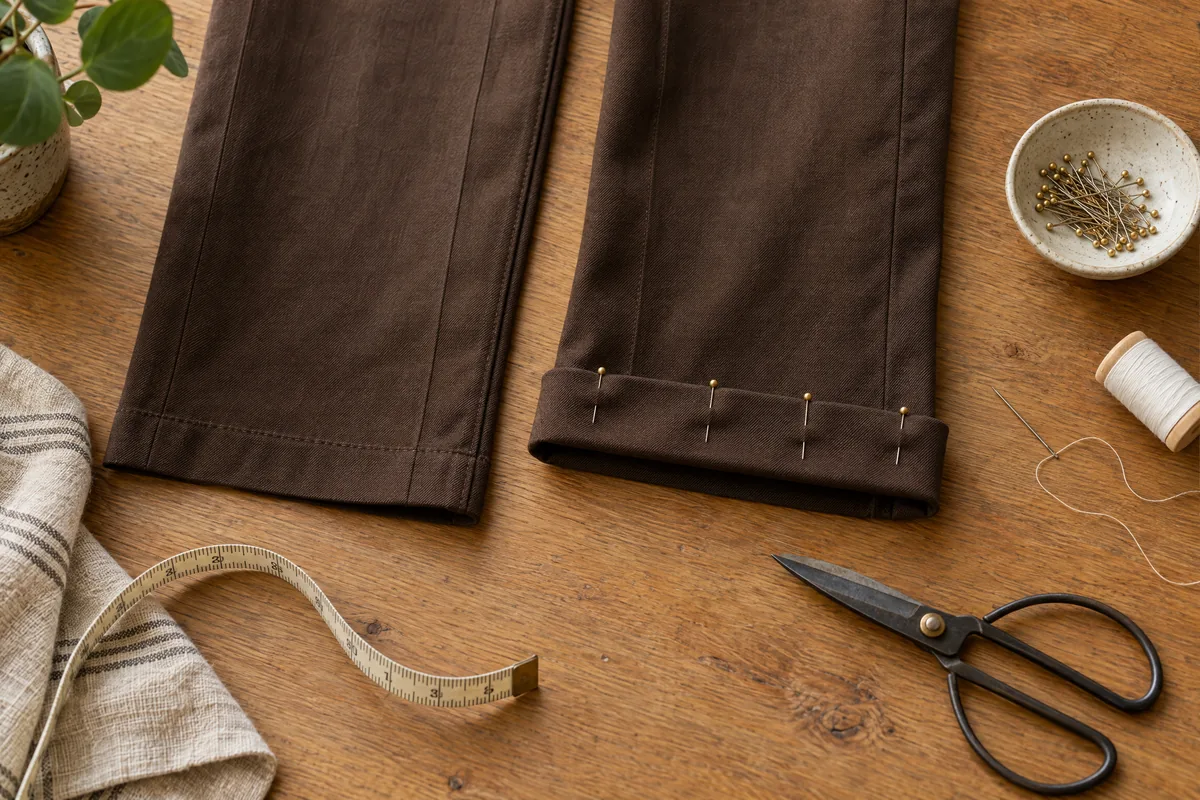
- Use a flexible measuring tape, straight pins or sewing clips, tailor’s chalk, and sharp fabric scissors.
- Keep an iron and ironing board nearby, because pressing is what gives a hem its clean shape.
- Choose thread that closely matches the garment for an invisible finish or contrasting topstitching for a casual look.
- Use a universal needle for most woven fabrics, a denim needle for heavy jeans, and a ballpoint needle for knits.
- Set aside no-sew hem tape if you need a quick, temporary, or machine-free solution.
Measure, Mark, and Cut With Confidence
A precise mark is the foundation of how to hem pants evenly. With the pants inside out, fold the hem to your chosen finished length and pin it in several places around each leg. Measure from the original hem or from the crotch seam to the folded edge on both legs so the final lengths match.
Once the fold is pinned, remove the pants and lay them flat. Use chalk or a washable fabric marker to draw a guideline along the folded crease. Then mark a second line below it for the hem allowance: about 1 to 1 1/2 inches for most trousers, 1 inch for lighter fabrics, and up to 2 inches for tailored wide-leg styles when fabric allows.
Do not cut until you have checked the markings twice. Compare inseams, outseams, and the distance from your marked line to the original hem. If the legs were not identical before alteration, following the original hem may be more reliable than assuming the fabric edges are perfectly square.
Trim only the excess fabric below the allowance line with sharp scissors. For fabric that frays easily, finish the raw edge with a zigzag stitch, serger, pinking shears, or a narrow fold before completing the hem. Leaving enough allowance gives you room to adjust later if you decide the pants need a little more length.
How to Hem Pants With a Sewing Machine
For a durable, polished result, a machine-sewn hem is the standard method for how to hem pants. Fold the raw edge up by about 1/2 inch and press it, then fold again to your marked finished length so the raw edge is enclosed. Pin or clip around the leg, placing extra clips near bulky side and inseam seams.
Set your machine to a straight stitch for a visible casual hem or use a blind-hem setting when your machine has one. Test the stitch length and tension on a scrap of similar fabric or on the excess piece you trimmed away. A medium stitch length works for most woven pants, while thicker denim may need a slightly longer stitch to prevent puckering.
Sew slowly around the leg, keeping the folded edge aligned with your guide. Stop with the needle down when you need to pivot or adjust the fabric, and do not pull the garment through the machine. At thick seams, hand-turn the wheel if needed so the needle does not bend or skip.
Press the finished hem from the inside, using a pressing cloth if the fabric is delicate or prone to shine. Try the pants on again with your chosen shoes before repeating the process on the second leg. That final fitting is especially worthwhile with ankle-length styles, cropped silhouettes, and pieces styled with our shoe collection.
- Use matching thread for understated trousers and a heavier topstitching thread only when the original garment uses it.
- Backstitch briefly at the beginning and end of a visible straight stitch to secure the seam.
- Keep the needle at least 1/8 inch from the folded edge so the hem remains flat and sturdy.
- Avoid sewing directly over pins, which can damage the needle and cause uneven stitches.
- Press each fold before sewing instead of relying on pins alone.
Hemming Trousers by Hand for a Nearly Invisible Finish
Hemming trousers by hand is an excellent option for dress pants, delicate materials, and any garment where you want the stitches to disappear from the outside. It takes longer than machine stitching, but it offers control around curved hems and avoids a visible row of thread across the front of the leg. This technique is also useful when you only need a small adjustment.
Prepare the double-folded hem as you would for machine sewing, then thread a hand-sewing needle with a single strand of matching thread. Start inside the folded hem with a small knot hidden in the fold. Take a tiny pick of one or two fabric threads from the pant leg, then pass the needle through the folded hem about 1/4 inch away.
Continue with small, evenly spaced blind stitches around the leg. The thread should be secure enough to hold the hem but not pulled tight enough to dimple the fabric. Check the outside every few inches; if you can clearly see your stitches, make your fabric picks smaller.
Hemming trousers by hand is also a smart way to preserve the drape of fluid trousers. Press lightly when you are done, and let the garment cool flat before trying it on. For dressier proportions, consider how the finished line works with tops from our tops and blouses collection so the outfit looks balanced from waist to hem.
- Use a fine, sharp needle and thread that matches the garment as closely as possible.
- Keep your stitches about 1/4 to 1/2 inch apart for a secure but flexible blind hem.
- Pick up only a few threads from the outer fabric on every stitch.
- Knot the thread within the hem fold rather than on the visible outer leg.
- Avoid pulling the thread tight, which can create puckers along the hemline.
How to Hem Pants With No-Sew Hem Tape
When time is short, no-sew hem tape offers a simple answer to how to hem pants without a needle or machine. This heat-activated adhesive sits between the folded fabric layers and bonds them together when pressed with an iron. It works best on clean, smooth woven fabrics and is particularly convenient for a quick event-ready adjustment.
First, check the care label and test the tape on an inconspicuous area or trimmed scrap. Some fabrics cannot tolerate the heat or steam required for bonding, and highly textured, stretchy, or very thick materials may not adhere well. Follow the tape package directions for iron temperature, steam, and pressing time instead of guessing.
Mark and press the desired hem, then cut a strip of tape slightly shorter than the circumference of the pant leg. Place it inside the folded hem, keeping it away from the very edge so adhesive does not seep onto the iron or outside of the pants. Press firmly in sections, lifting and lowering the iron rather than sliding it.
No-sew hem tape can be practical for a temporary fix, but inspect it after washing and re-press or replace it as needed. If you are deciding between a fast tape hem and a stitched finish, consider how often you will wear the piece and whether it is part of a go-to look with our outerwear and jackets.
- Choose tape labeled for the fabric weight you are hemming, since lightweight and heavy fabrics need different hold.
- Use a pressing cloth when the fabric is heat-sensitive or when you are unsure about the iron setting.
- Allow the hem to cool completely before moving the pants so the adhesive can set.
- Keep tape clear of side seams when possible, because bulky layers can prevent an even bond.
- Save a small amount of matching tape for later touch-ups after laundering.
Where to go from here
Learning how to hem pants gives you more control over fit, comfort, and proportion. Measure with the right shoes, press every fold, and choose a machine stitch, hand-sewn blind hem, or no-sew method that suits the fabric and your timeline.
If you would like a fresh style to put your new skills to work on, browse our new arrivals or visit Pieces of a Dream at 2448 Central Ave, St Petersburg, FL 33712. A careful hem is a small finishing detail that helps your favorite pants look distinctly made for you.